We have already discussed the role of VBA and its usefulness in Excel. VBA is a legacy program that Microsoft originally used to write its programs for Windows operating system.
In today’s world, it is very useful to automate our actions in Office programs.
In the example below, we will show how to use VBA to get Row numbers.
Writing a Code Applicable in Workbook
To input the code in VBA, we need to go to the Developer tab >> Code >> Visual Basic:
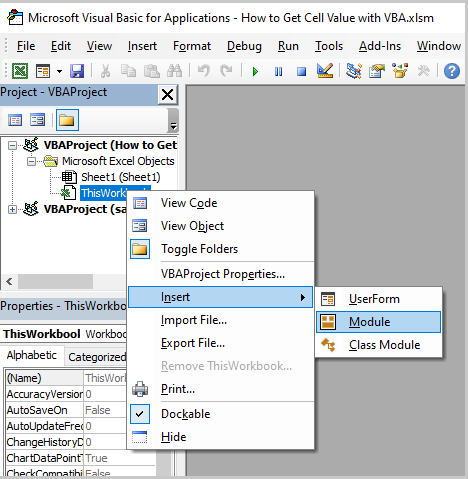
Once we click on it, on a pop-up window that appears we need to find the Workbook in which we will store our code, and then right-click on the left window and then go to Insert >> Module:
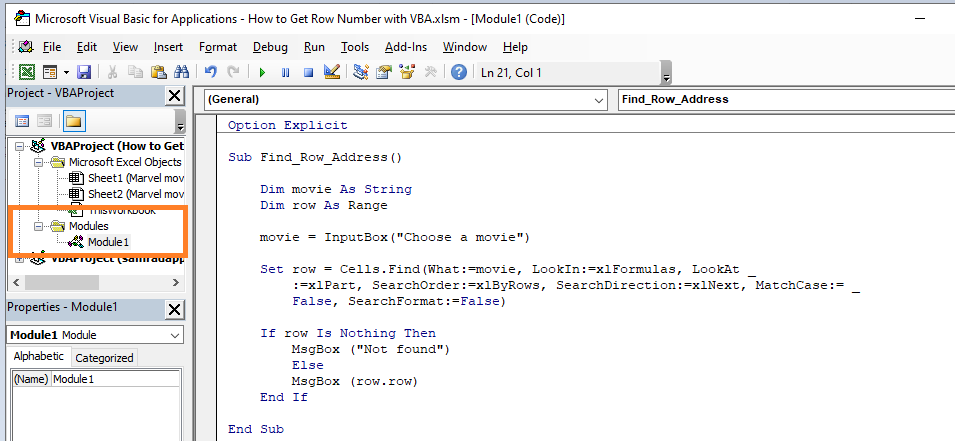
We will be presented with a clear window in which we will write our code:

An easier way to do the actions mentioned above would be to press a combination of ALT and F11.
Get Row Number with VBA with Cell Change
Now, the above-mentioned process would be an approach if we want to create a code that will be stored on the Workbook or Application level.
If we want to create a code that will be applied only on a certain sheet, we need to insert our code directly into that sheet.
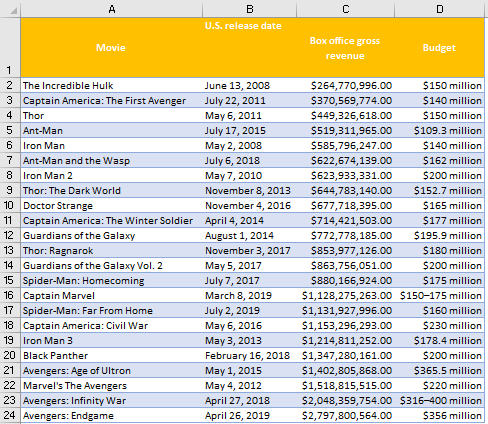
We will use the following table of Marvel movies with U.S. release date, box office gross revenue, and budget for our example:
If we want to declare formulas that will be applied to a certain sheet, we need to go into that worksheet in our module and then choose from various options from the dropdown on the right side:
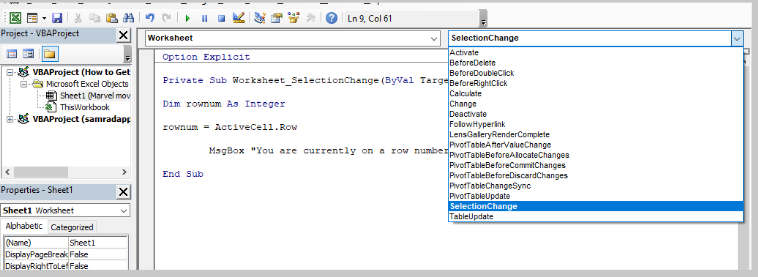
To get the row number in VBA whenever we change the location of our cursor, we will input the following formula:
|
1 2 3 4 5 |
Private Sub Worksheet_SelectionChange(ByVal Target As Range) Dim rownum As Integer rownum = ActiveCell.Row MsgBox "You are currently On a row number " & rownum End Sub |
The first row in this formula defines a private sub- meaning that it can be called only by the procedures which are stored in this VBA module.
Worksheet_SelectionChange means that our formula will be activated on any change in our worksheet. ByVal declares our variable Target as Range.
It is worth mentioning that these formulas are rather generic.
If we would go on a choose TableUpdate from the dropdown presented in the picture above, the following formula pattern would be created:

In the next row, we define the rownum variable to be an integer, and then define it to be equal to the row of our active cell.
We then present a message box that states that the user is currently on a row whose number is equal to the row defined above.
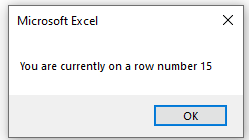
The results of our code can be seen when we go to our sheet and click on any row. We get the following message:
Get Row Number with VBA with Input Box
In the previous VBA code, you can notice that we had little to no influence on the execution of our code. Since we move throughout the sheet all the time, we have the code execution all the time.
If we want to find out the row number with VBA based on a specific field in our table (in the following example name of our movie) we can use this code:
|
1 2 3 4 5 6 7 8 9 10 11 12 13 14 |
Sub Find_Row_Address() Dim movie As String Dim row As Range movie = InputBox("Choose a movie") Set row = Cells.Find(What:=movie, LookIn:=xlFormulas, LookAt _ :=xlPart, SearchOrder:=xlByRows, SearchDirection:=xlNext, MatchCase:= _ False, SearchFormat:=False) If row Is Nothing Then MsgBox ("Not found") Else MsgBox (row.row) End If End Sub |
We will create a new module for this code, and we will keep the original name (in our case Module 1):
Our code does the following:
- Declare two variables- movie and row,
- Set our movie variable to be equal to the value in the InputBox (the user will input this when the code executes).
- We set the row variable to be the cell in which the movie is found.
- Make the IF function that will check if the movie in InputBox exists in our table. If not, then we show a “Not found” message. If yes, then we show the row of the active row (the row in which our movie is found).
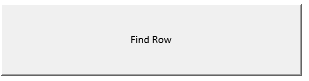
This code is currently “hidden” from our user, so our first step is to make it visible in our sheet.
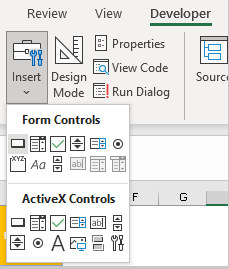
To do this, we will go to the Developer tab >> Controls >> Insert >> Form Controls. From these options, we will click on the first option:
When we click on it, we will get a plus sign that we can expand (drag and drop). Once we define its dimensions, the following pop-up appears:
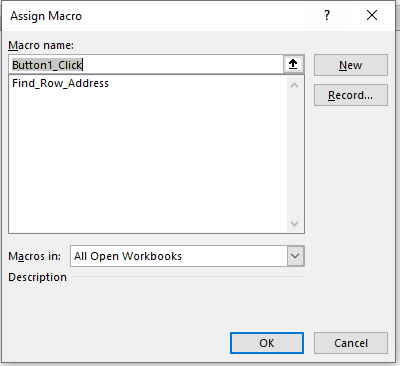
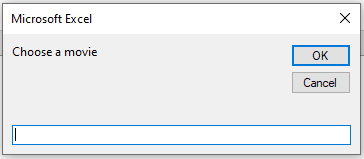
We now need to assign our macro to this button. To do this, we just need to click on our macro (First_Row_Address). We will then click OK.
Now we will have the button for which we will change the name to “Find Row”:
Now, whenever the user clicks on this button, the code will be executed. For example, we will click on it and the following message will appear:
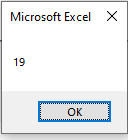
We will choose the movie: “Iron Man 3”. We know that this movie is found in row number 19, so the message from our code should show this number. Once we click OK, this number will be shown:
Of course, we can always change our message to something like: “The row of your movie is number …” or something like that, as we did in the example above.