When handling Excel data, we can often find ourselves in a situation where we need to merge or split some cells, to make a sense of our table, or to make it neater.
It is important to remember that one cannot go without the other, meaning that, to split the cells, they first have to be merged.
This means that you cannot split a cell into two smaller cells within a single column.
Merging Two Cells in Excel
Let’s say that we have a table with a couple of players from the Los Angeles Lakers basketball team:

We used different columns for each player. We want to have our header- Los Angeles Lakers, in the middle and ranging through all of our data. For this, we use the option in the Home tab- Merge & Center.
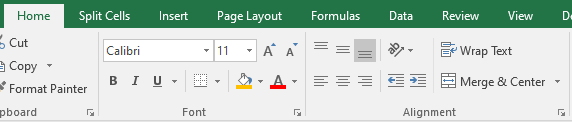
Merge & Center has several options:
- Merge & Center– Combines and centers the contents of the selected cells in a new larger cell.
- Merge Across– Merge selected cells in the same row into one large cell.
- Merge Cells– Merge the selected cells into one cell.
- Unmerge Cells – Split the current cell into multiple cells.
In practice, the first option is mostly used. We will select the cells where our data will be A1:E1 and then select Merge & Center.
The result is shown in the picture below:

Splitting the Rows in Excel
Now that we know how to merge the cells, it is easy to presume how can we split them, i.e. unmerge them.
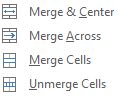
There are several options to do this:
- Click anywhere on our range and select Merge & Center again.
- Click anywhere on our range and select Unmerge Cells.
- Click anywhere on our range and select Split Cells.
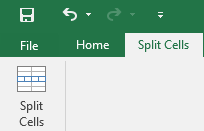
The first two options are pretty clear. The Split Cells option is not standard in Excel anymore, so you have to find this option in the ribbon.
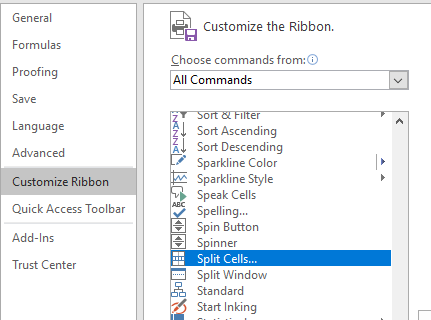
To do this, right-click anywhere on the ribbon, and then select Customize the Ribbon.
From the commands, select All Commands and then scroll down to find the Split Cells command:
You can then add this command on your tab, where you want:
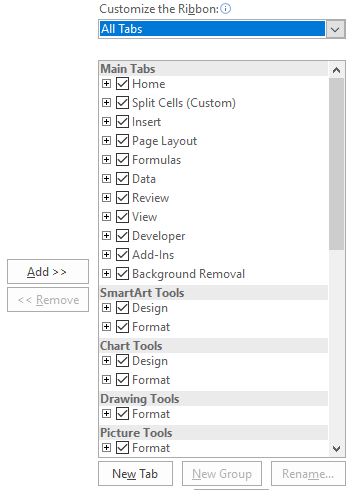
For this example, we have decided to create a whole new tab (Split Cells) and place it there. We have placed it right after the Home tab, so it looks like this:
This command pretty much does the same as the Merge & Center or Unmerge Cells command. Once again, for you to split the cells, they need to be merged in the first place.
It is important to say that when you split the cells, the content will always return in the first cell of the selected range (in our example cell A1).
Split Text Into Rows
What if we wanted to split our text into several rows? For example, what if we wanted to split the content Los Angeles Lakers into three separate cells?
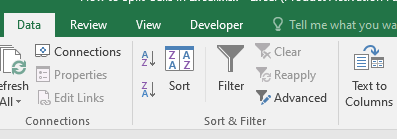
To do this, we use the Text to Columns command.
This command is located in the Data tab. First, we have to select the range of cells we want to split (in our case it is just one cell- A1), and then click Data– Text to Columns.
When we click on it, a pop-up will appear. This is a wizard that will take us through three steps to split our text.
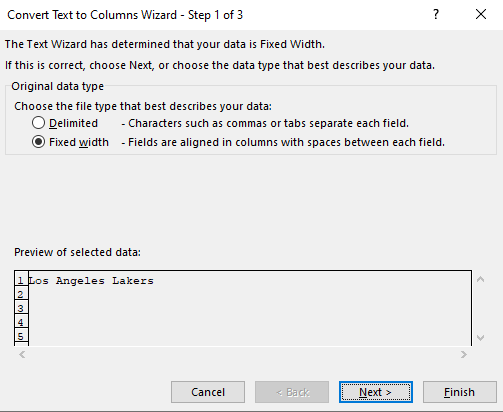
In Step 1, we have two options for splitting the text:
- Delimited– Characters such as commas or tabs separate each field.
- Fixed width– Fields are aligned in columns with spaces between each field. With this option, we can choose where to separate our text.
For our example, we will use the Delimited option. When we select it, it will take us to Step 2 of the Wizard.
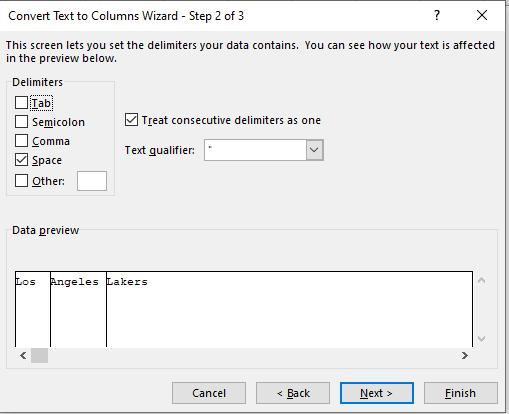
We now have to choose what will be our delimiter (what will separate our text). We can choose between tab, semicolon, comma, space, or other (here we pick any delimiter we want).
Since our text is separated by space, we choose Space for our example. Excel previews us the text that will be separated, as shown in the picture above.
After this, we go to Step 3. Since we are going to split our text into three columns, in this step we can choose the format for these new cells.
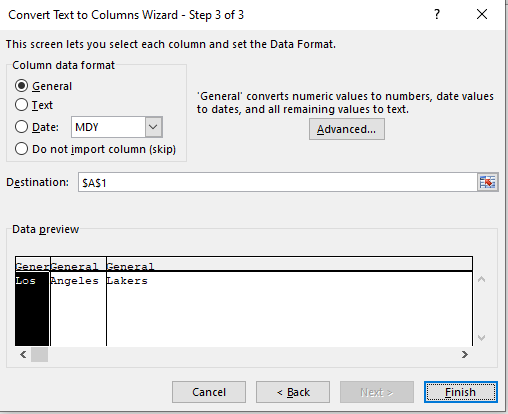
Finally, we choose the destination of our range. We only select the first cell for our data, and the rest will be placed on the right side of the first one.
We chose cell A1, so this basically means that we will replace the original data. When we click Finish, Excel will warn us about this:
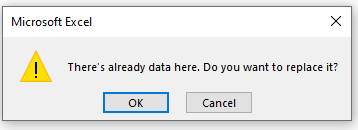
We will click OK to implement the changes. The final result is as follows:
