There are times when it makes more sense to build your custom menu rather than rely on the ones that come with Excel.
By creating your custom menu, you can gather in one place the commands you mostly use when creating your spreadsheets. For example, if you are a statistician, you can create a custom menu that contains only the commands you use in statistics, whether it’s built-in tools or your macros created specifically to do this kind of job. This will save you time and effort.
There are three main steps involved in creating a custom menu in Excel:
- Create a new custom tab.
- Add a new custom group to the custom tab.
- Add commands to the custom group.
In this tutorial, we will explain and demonstrate each of these steps in a way that is easy to follow so that you can quickly create the custom menu that you desire.
Step 1 – Create a new custom tab
The first step in creating a custom menu in Excel is to create a new custom tab on the Excel ribbon.
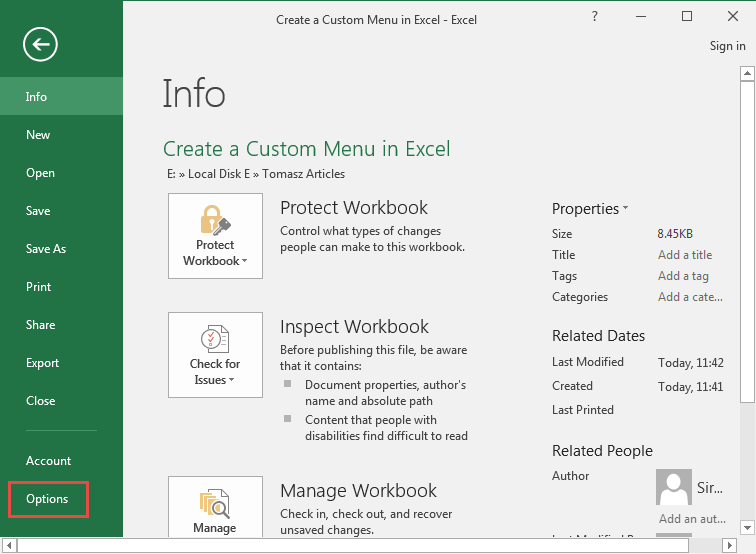
- On the File tab, click the Options button:
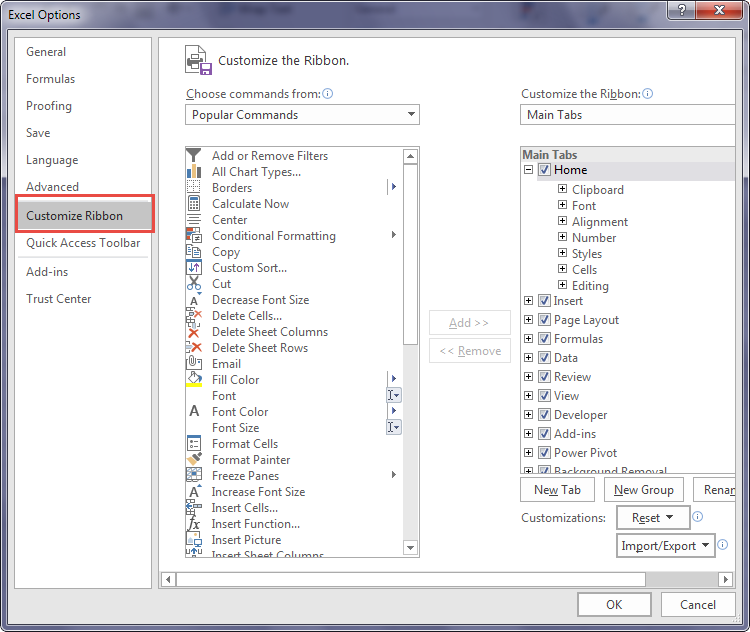
- In the Excel Options dialog box, click the Customize Ribbon:
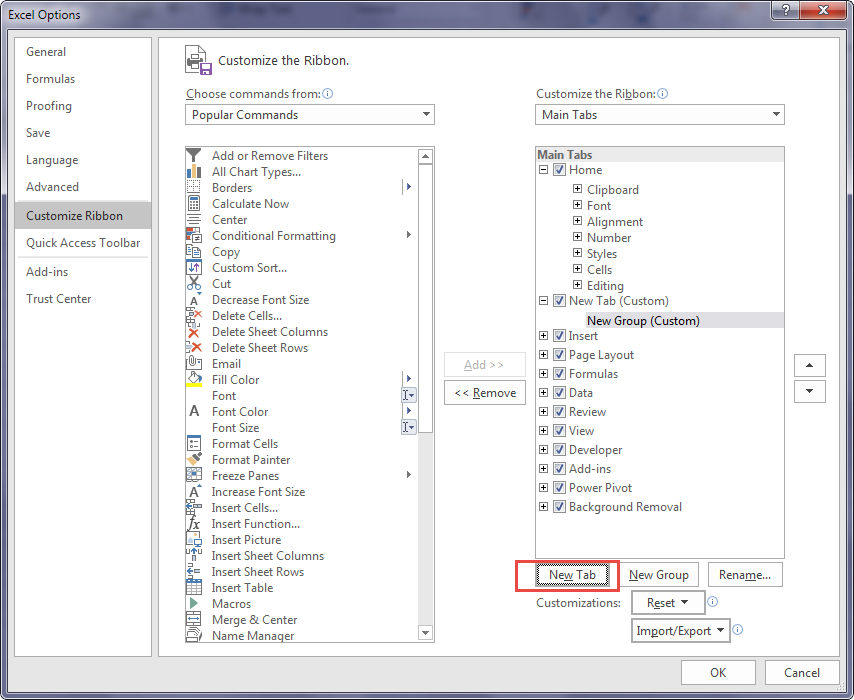
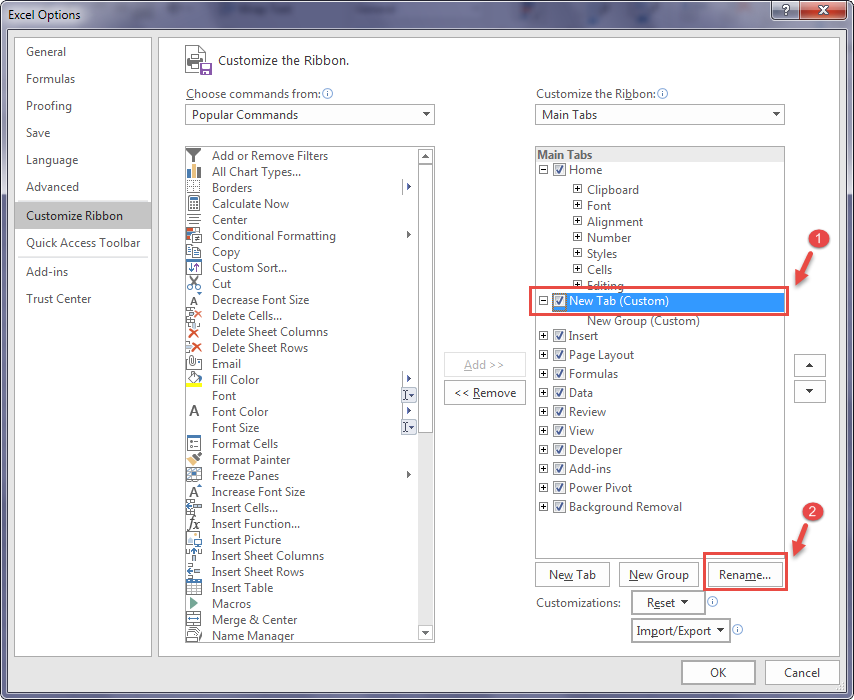
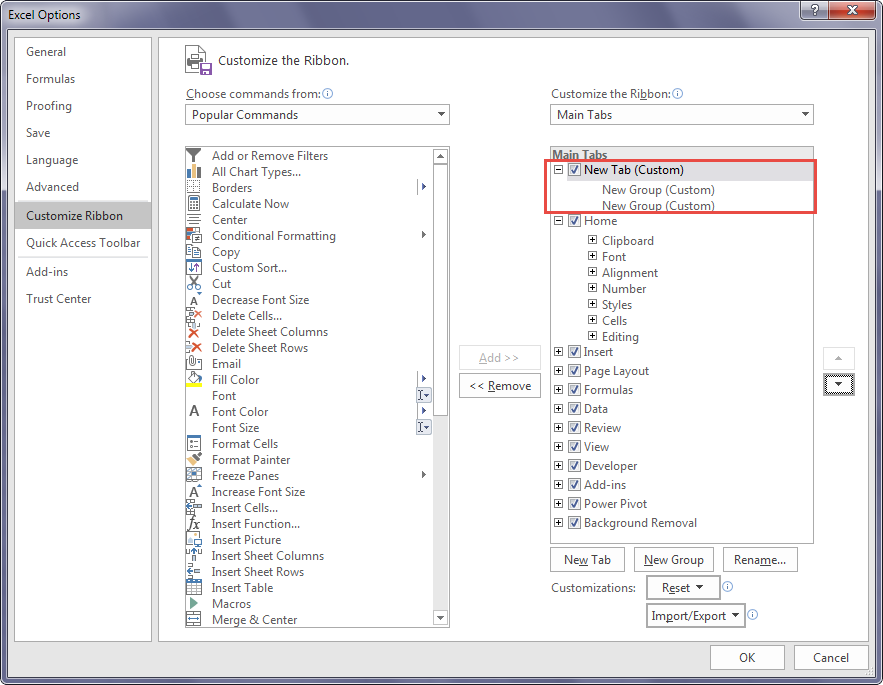
- To create a new tab, click the New Tab button:
- To rename the New Tab (Custom), select it and click the Rename… button:
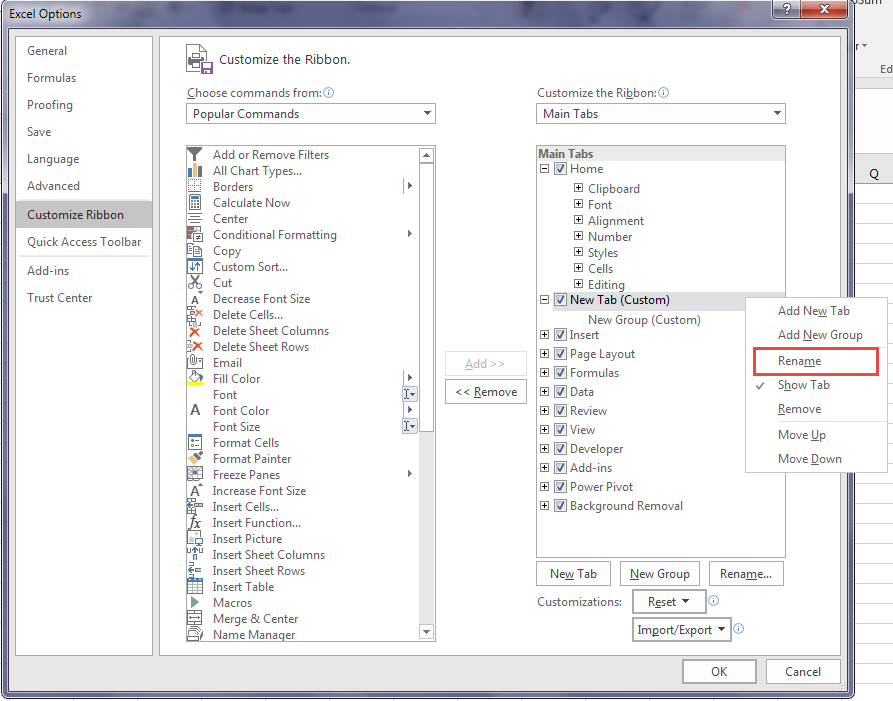
Alternatively, select the New Tab (Custom), Right-Click it, and select the Rename command on the popup menu:
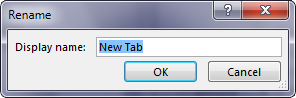
- Enter the name of the new tab in the Rename dialog box and click the OK button:
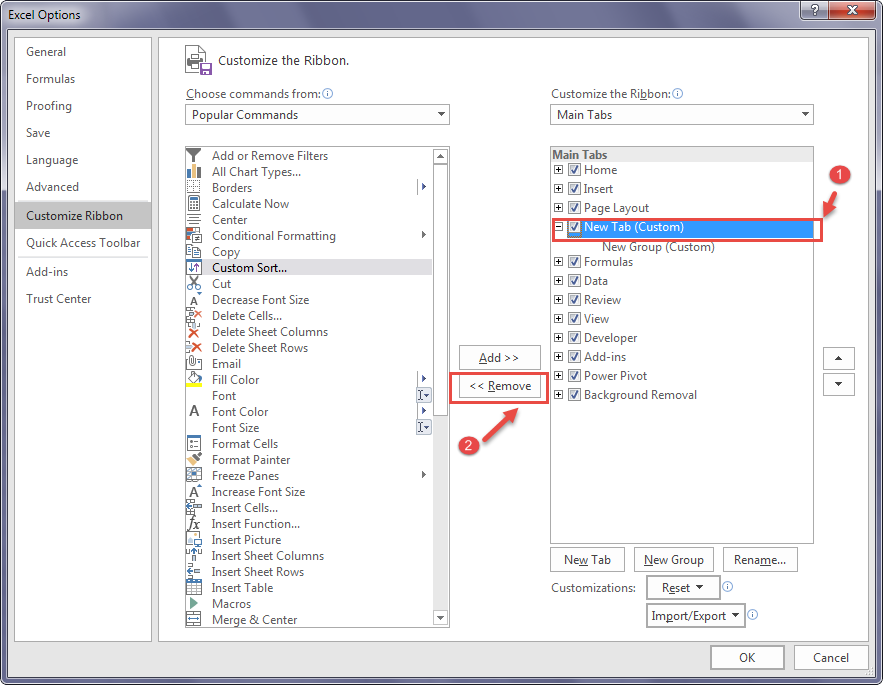
In some cases, you may want to remove a tab that you no longer need. To do that select the tab that you want to remove and click the <<Remove button:
Another way of removing a tab is to select the tab you want to remove, right-click it and click the Remove command on the popup menu:
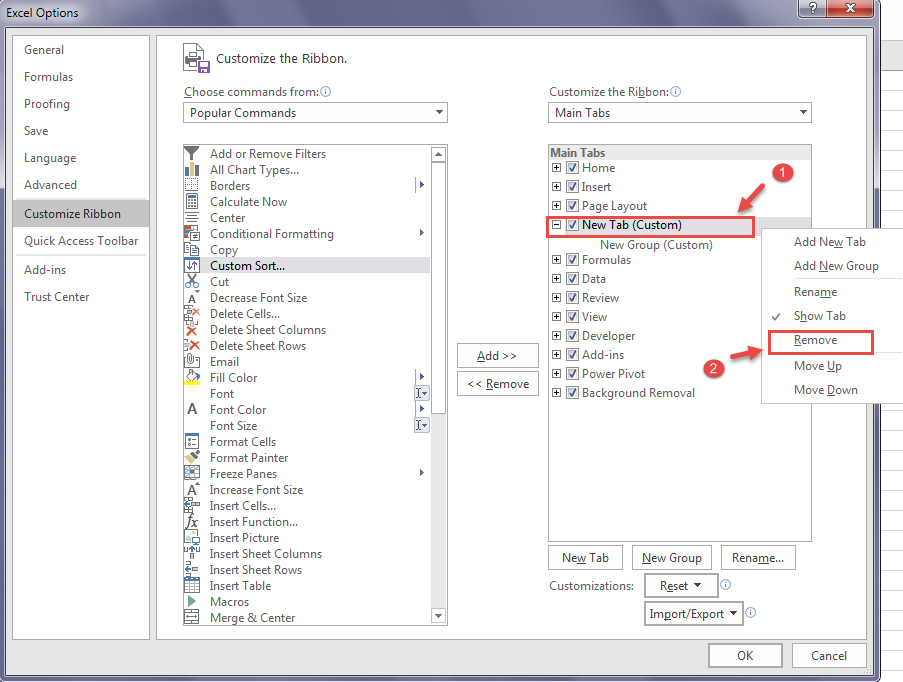
The custom new tab will be removed together with all its groups.
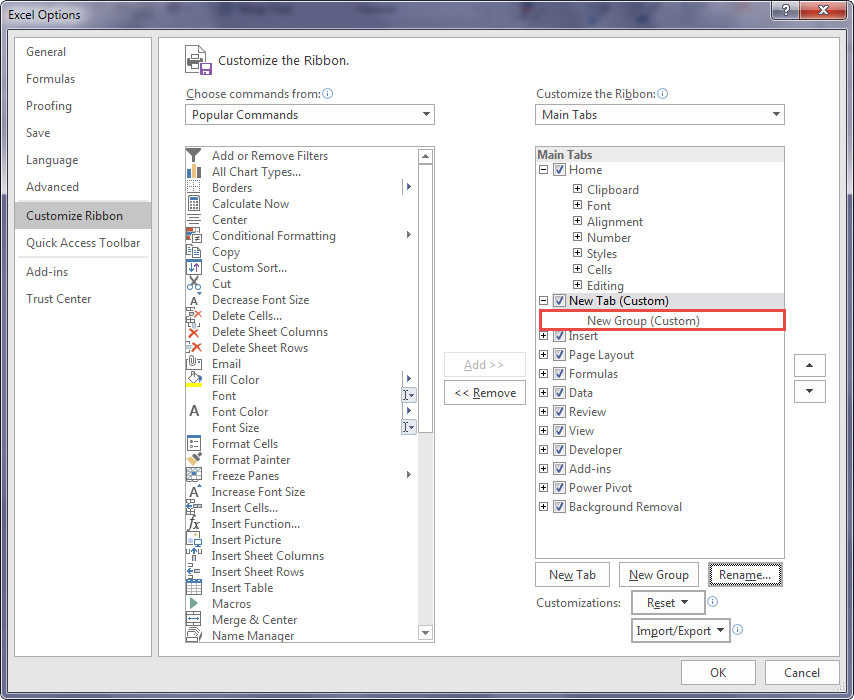
Step 2 – Create a new Custom Group
- When the new tab is created, a New Group (Custom) is automatically created under it:
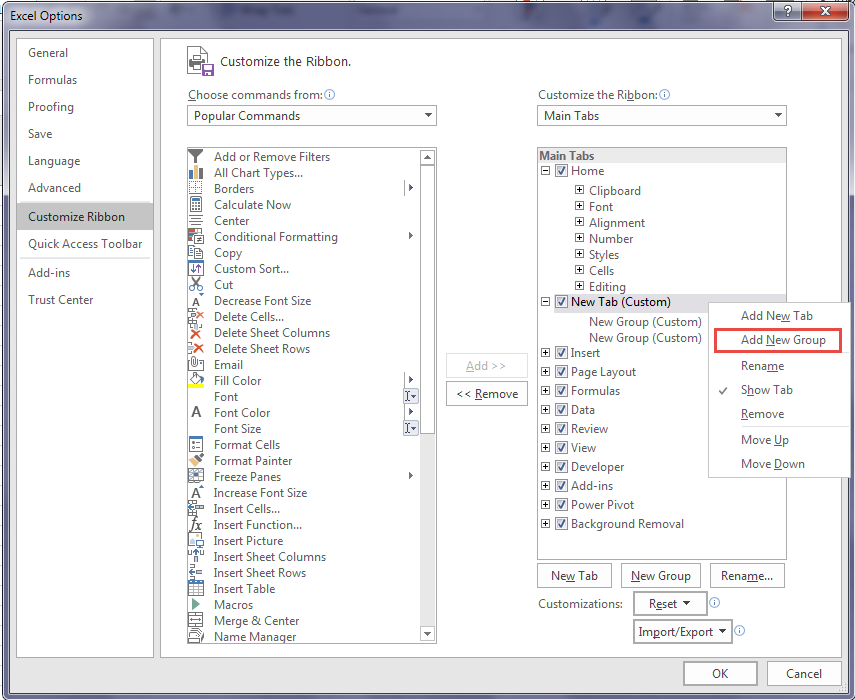
- To add a new additional custom group, click on the New Group button:
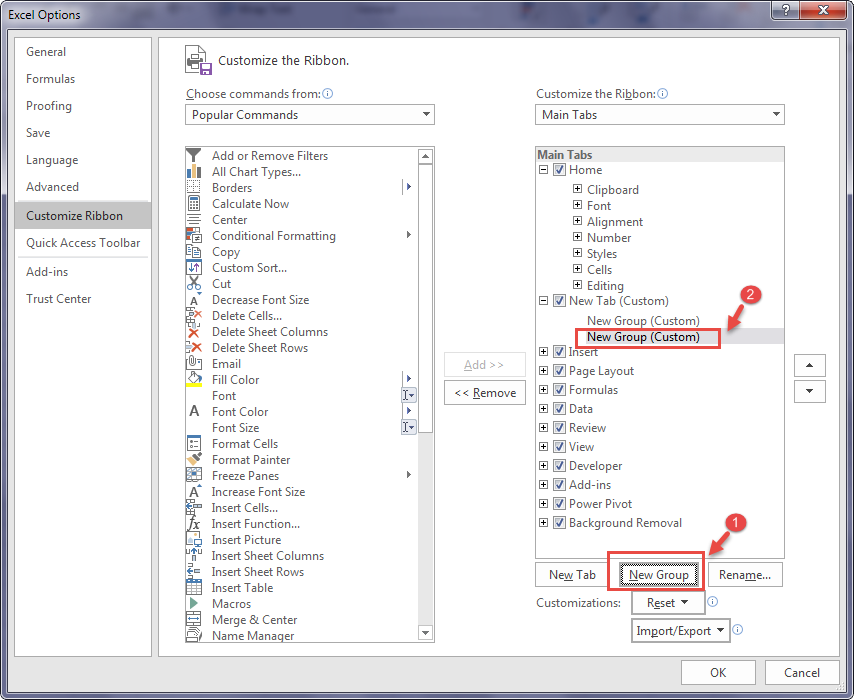
Alternatively, select the new tab, Right-Click it and click Add New Group button on the popup menu:
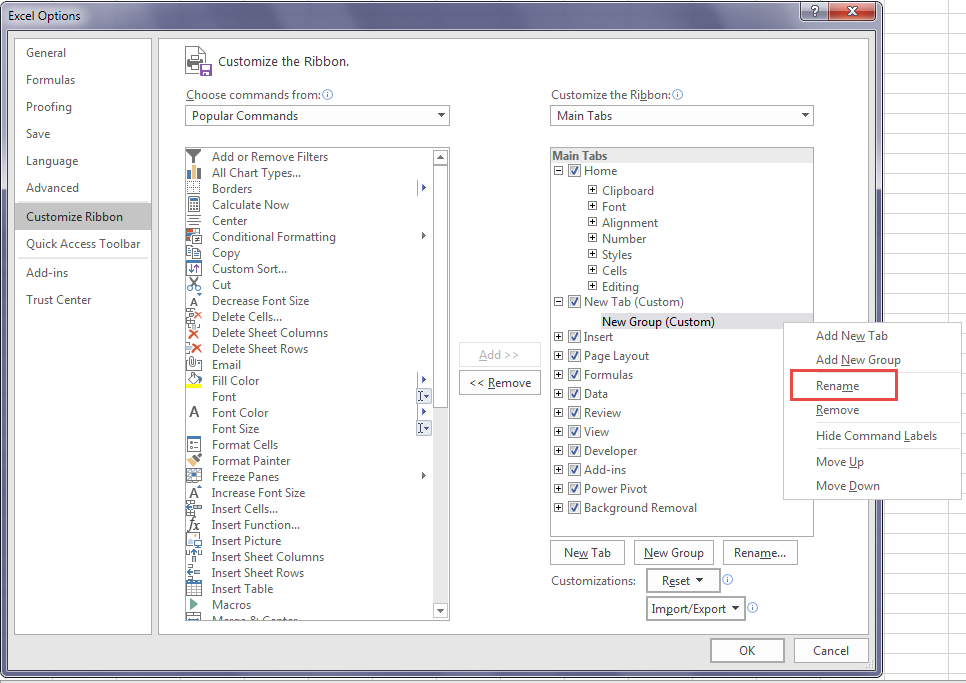
- To rename the new group, select it and then click the Rename… button:

Alternatively, select the new group, Right-Click on it, and click the Rename command on the popup menu:
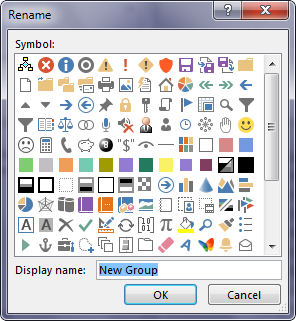
- In the Rename popup menu, in the Display name: box key in the name you want for the new group. From the Symbol: box, choose the symbol you want to represent the new group:
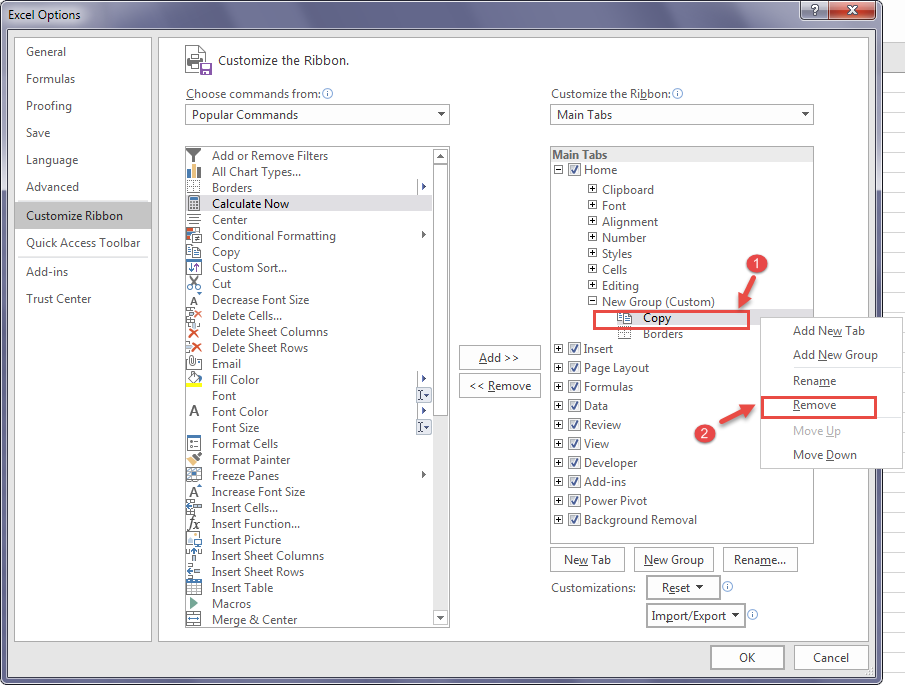
In case you want to remove a group from the new tab, select the group, Right-Click it and from the popup menu click the Remove command:
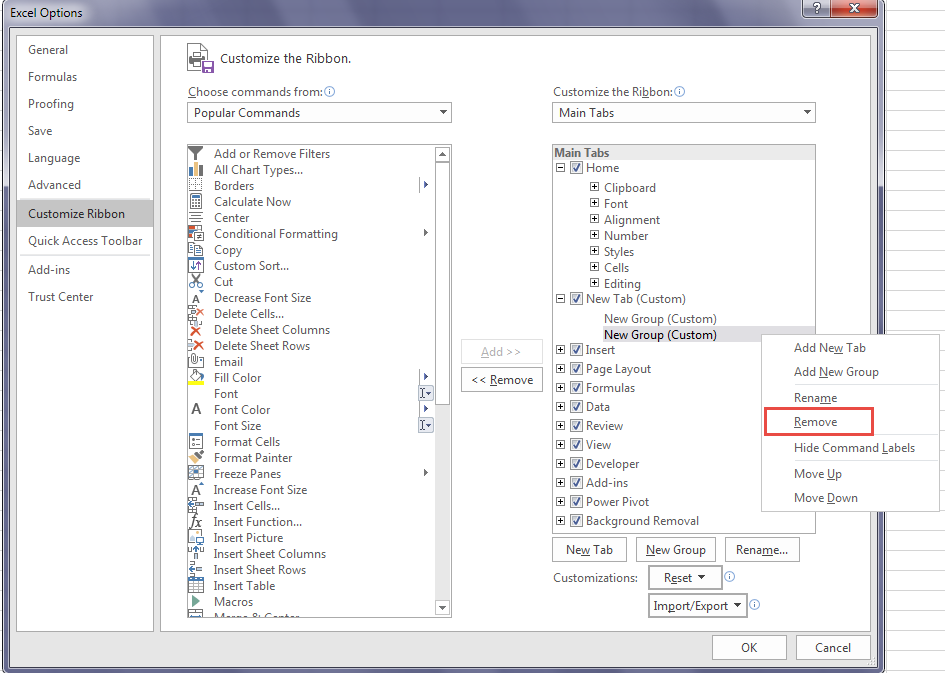
Another way of removing a group is to select the group, and click on the << Remove button:
This process will remove the group together with all its commands.
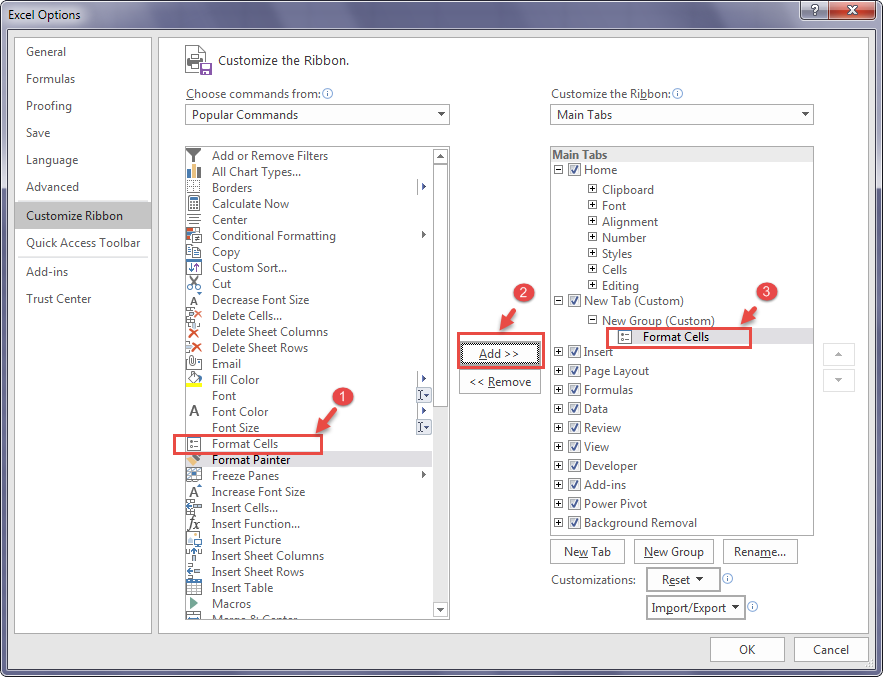
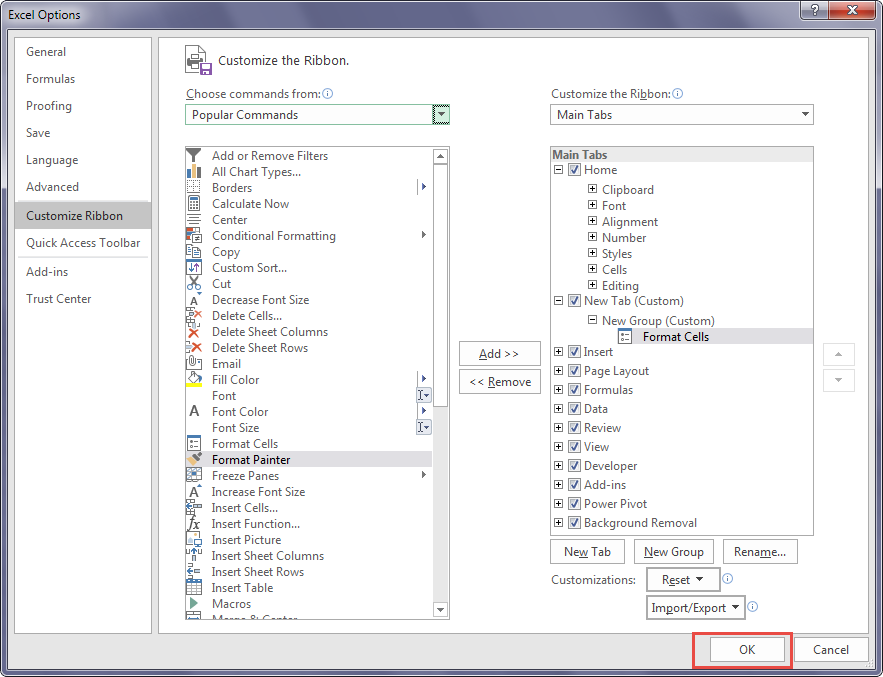
Step 3 – Add commands to the new custom Group
- Select the new group.
- From the Choose commands from area, select the command you want to add.
- Click on the Add>> button.
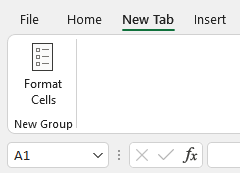
In the following example, I have added the Format Cells command in the New Group (Custom):
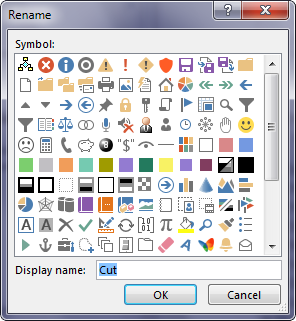
- To rename a command, select it and then click the Rename… button. Alternatively, Right-click the command and click the Rename command from the shortcut menu.
In the Rename dialog box, type in the new display name for the command and select the symbol to represent the command, and then click the OK button:
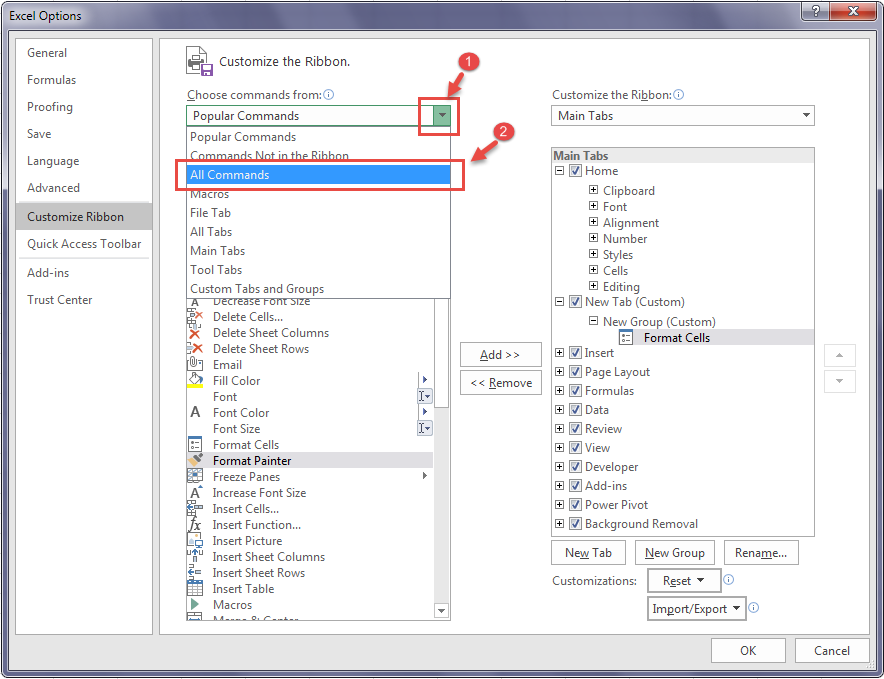
To access more commands to add to your custom group, click the down arrow on the Choose commands from box, and select All Commands:
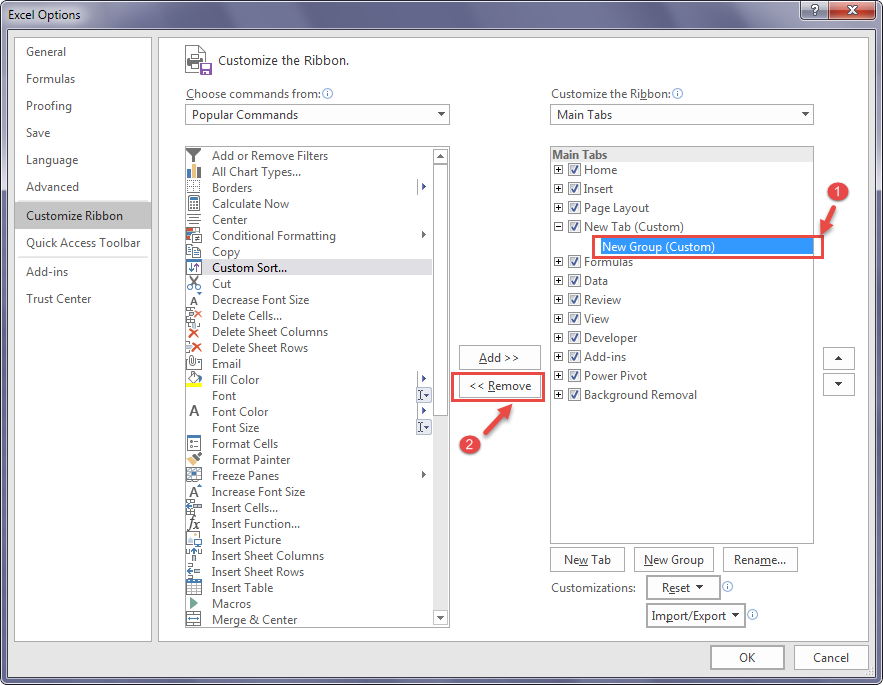
To remove a command from a group, select the command and then click on the << Remove button:
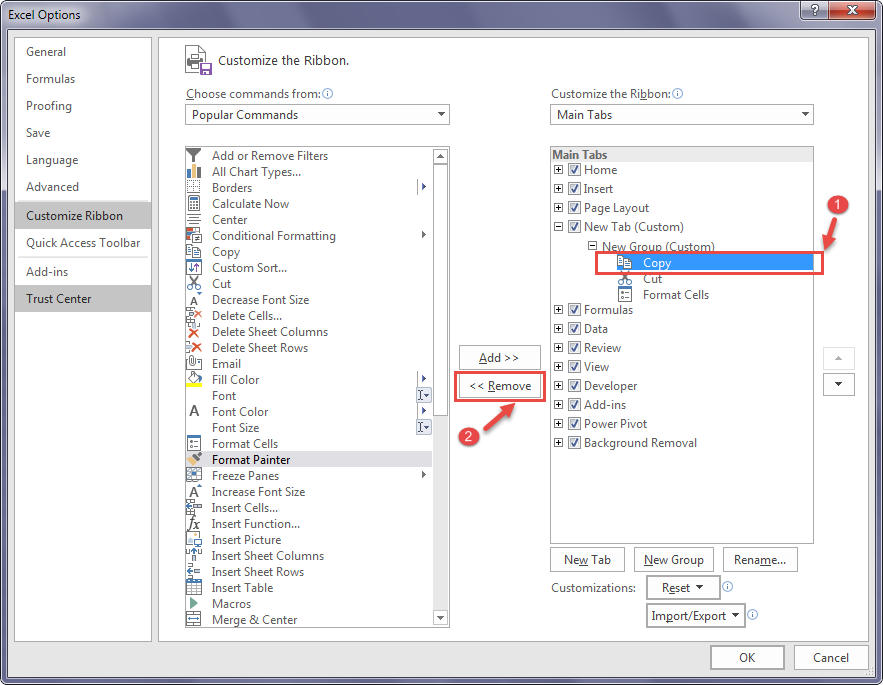
Alternatively, you can select the command you want to remove, Right-Click it, and click the Remove command on the popup menu:
After you have finished all the customization settings click the OK button to close the Excel Options dialog box:
Additional information
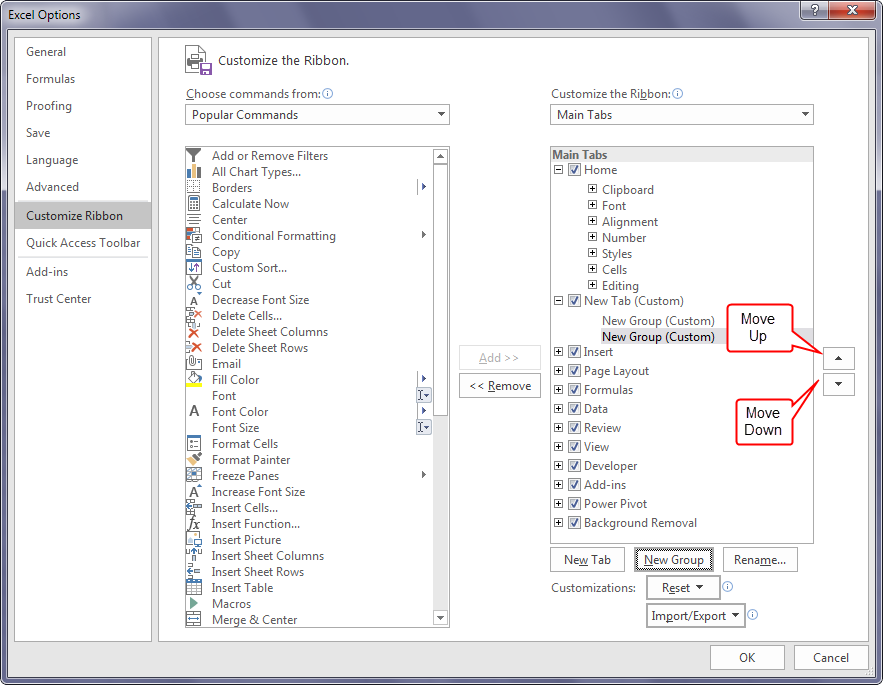
In the process of creating or after creating your custom menu, you may need to reorder the position of the custom tab(s), custom group(s), and the individual commands in the custom group(s).
We use the Move Up and Move Down buttons to change the order of tabs, groups, and commands:
To reposition the new tab upwards, select it and click the Move Up button once to move it on top of the tab that immediately precedes it.
For example, to move the new custom tab on top of the Home tab, select the new custom tab and click on the Move Up button once:
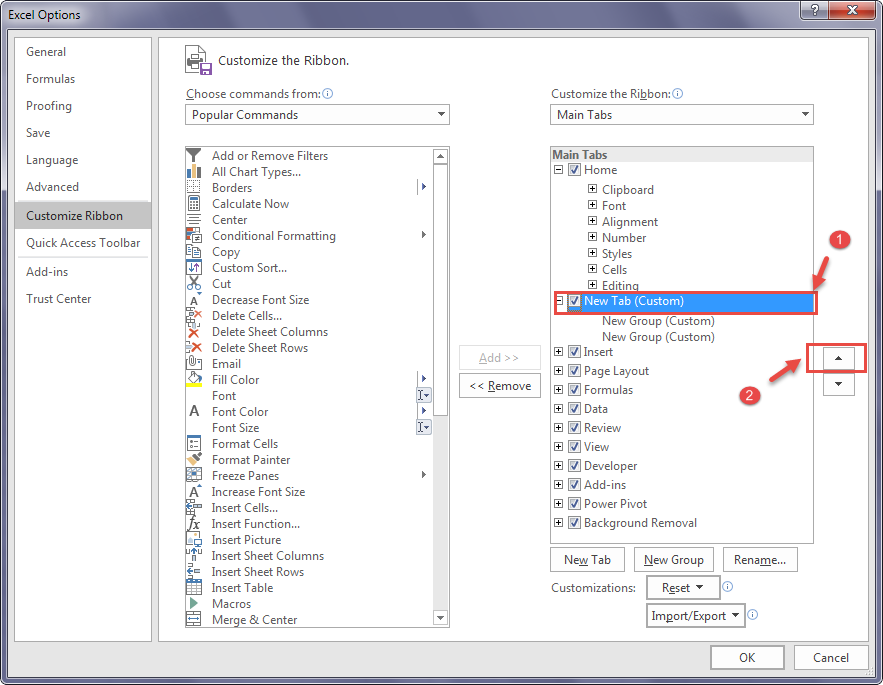
This will move the New Tab (Custom) on top of the Home tab. Notice that the tab has moved with the groups in it:
To move the new custom tab below the tab immediately under it, select the new custom tab and click the Move Down button once. It will move together with its groups.
To reorder the groups in the tabs, select the group you want to move and click the Move Up button to move it up and the Move Down button to move it down.
To reorder the commands in the new custom group, select the command you want to move, and click the Move Down button to move it down and the Move Up button to move it up.
Import/Export Custom Menu
Sometimes after creating the custom menu you may need to share it with an Excel program running on another computer.
You will need to follow the following steps to share your custom menu:
- Export the custom menu.
- Import the custom menu
Export the Custom Menu
To export the custom menu follow these steps:
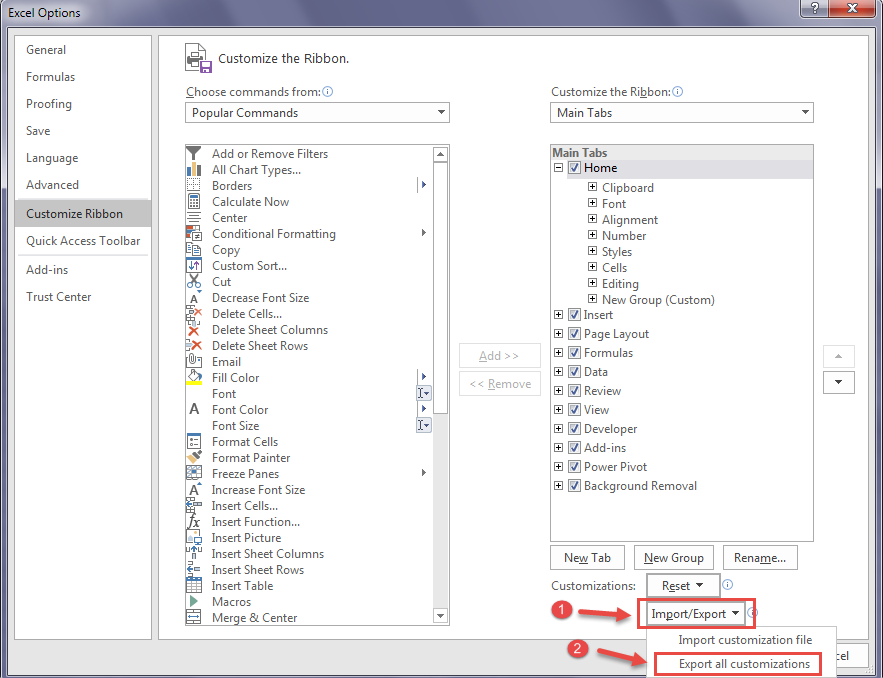
Step 1 – In the Excel Options dialog box, click the Import/Export button and select Export all customizations:
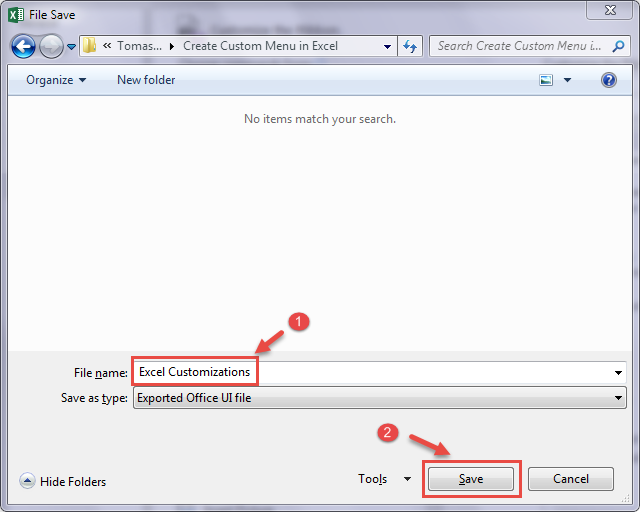
Step 2 – Save the Excel Customisation file in a shared network folder or a flash drive:
Import Excel Customisation
To import the Excel Customization file into the Excel program running on another computer follow the following steps:
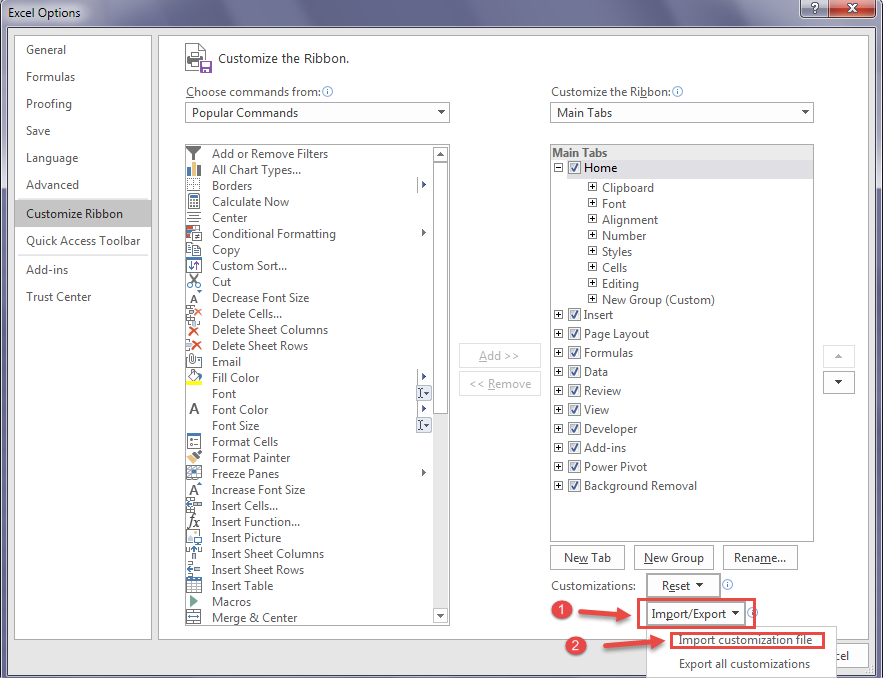
Step 1 – In the Excel Options dialog box, click on the Import/Export button and then click on the Import customization file command:
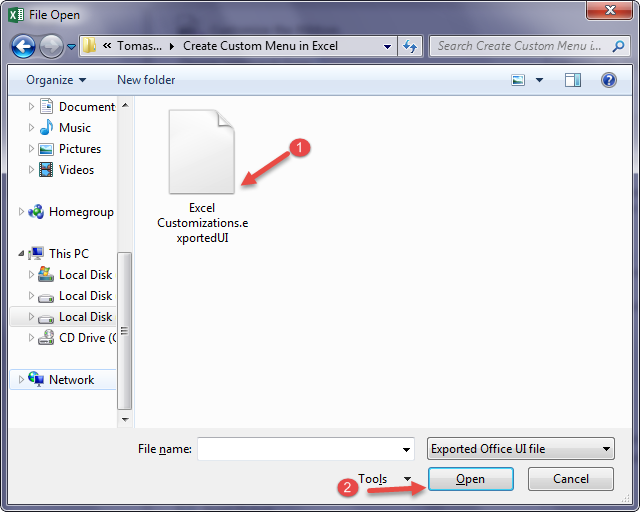
Step 2 – Navigate to the shared folder or flash drive where you saved the Excel Customization file, select the Excel Customization.exportedUI file and then click Open:
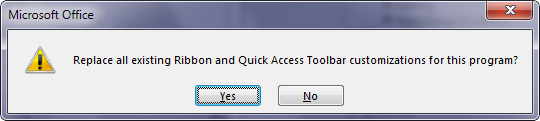
Step 3 – Click the Yes button:
Step 4 – Click on the OK button on the Excel Options dialog box to complete the importation:

After you click OK, you can see that between the Home and Insert tabs, there is another one, called New Tab. It consists of the group called New Group and the Format Cells button.