In Excel 2019, but also in earlier versions, Excel allows you to create a password to lock a number of cells or even the entire worksheet to prevent it from being modified by other users who don’t know the password.
By default, when you lock a worksheet a user without a password will be able to select protected cells, but won’t be able to edit or format them. These settings can be changed in the options.
How to lock all cells inside a worksheet
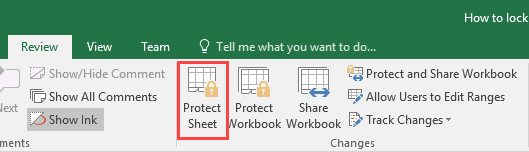
- Navigate to Review >> Changes.
- Click the Protect Sheet button.
- Enter the password. You don’t have to enter anything, but then a user can unprotect the sheet, only by clicking the Unprotect Sheet button.
- Reenter the password.
- Allow Actions. Inside the Protect Sheet window, you can select which actions users will be able to perform. By default, only selecting locked and unlocked cells are You can keep the default setting, select more actions, or uncheck all of them.
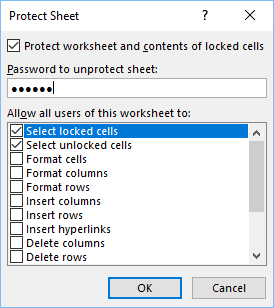
- Click OK.
If you try to edit any cell, you will get an error.

How to lock selected cells inside a worksheet
Instead of protecting all cells inside a workbook, you can allow users to modify some of them. Here, is how you can do it.
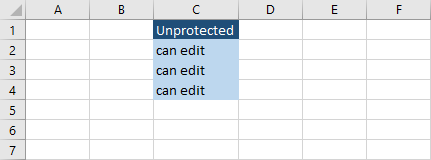
- Select cells you want to be unlocked. In our example, we will keep cells C2:C4
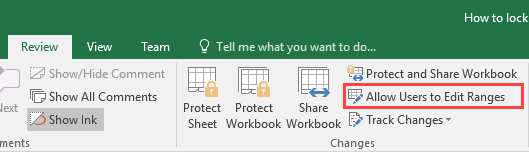
- Navigate to Review >> Changes.
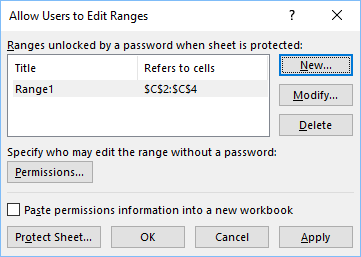
- Click the Allow Users to Edit Ranges button.
- Create a new range. The cells, you’ve already selected are typed inside Refers to Cells area. You can modify them if you want. You can add a password, but we want all users to have access to these cells.
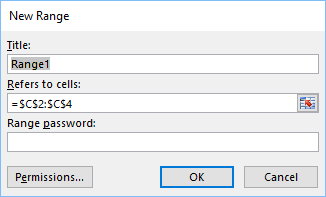
- Click OK.
- Inside Allow Users to Edit Ranges window, click OK.
- Navigate to Review >> Changes >> Protect Sheet Button. Make the same changes as you did in protecting the entire worksheet.
You can edit cells C2:C4.
If you try to edit any cell outside this range you will get the same error as before.